这个教程无论是百度还是子比论坛里都有,我这个是稍微优化了一下PC和移动端的显示,如果你在网站主题后台的【顶部多功能组件】PC端显示和移动端显示这里进行单独设置,移动端访问会直接把PC端的静态缓存显示到移动设备上。
查看Nginx模块
nginx -V 2>&1 | grep ngx_cache_purge -o控制台显示如下:

Nginx配置
创建缓存目录
sudo mkdir -p /var/cache/nginx/fastcgi_cache
sudo chown -R www-data:www-data /var/cache/nginx/fastcgi_cache
sudo chmod -R 755 /var/cache/nginx/fastcgi_cache
全局设置
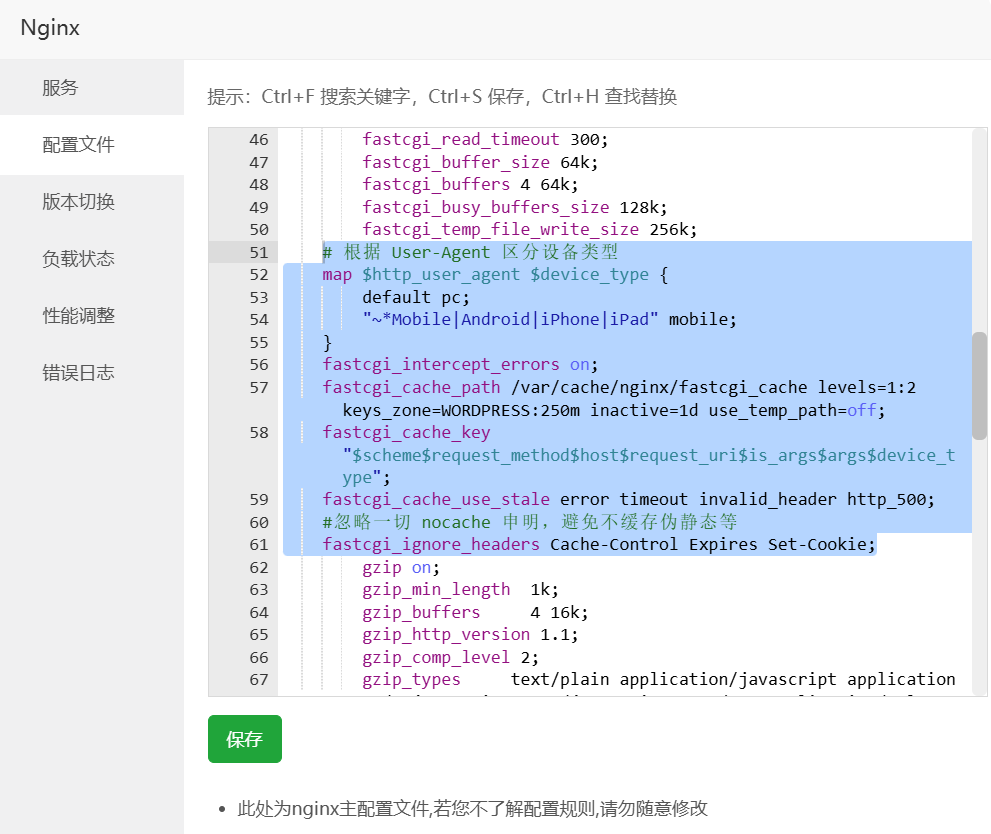
现在我们开始配置nginx,来到宝塔后台,在软件商店找到Nginx,点击设置按钮,在配置修改中添加以下内容:
# 根据 User-Agent 区分设备类型
    map $http_user_agent $device_type {
        default pc;
        "~*Mobile|Android|iPhone|iPad" mobile;
    }
		fastcgi_intercept_errors on;
		fastcgi_cache_path /var/cache/nginx/fastcgi_cache levels=1:2 keys_zone=WORDPRESS:250m inactive=1d use_temp_path=off;
    fastcgi_cache_key "$scheme$request_method$host$request_uri$is_args$args$device_type";
    fastcgi_cache_use_stale error timeout invalid_header http_500;
    #忽略一切 nocache 申明,避免不缓存伪静态等
    fastcgi_ignore_headers Cache-Control Expires Set-Cookie;
加好之后截图如下:
网站设置
在宝塔后台的网站列表中,找到你的网站,并且点击设置按钮,将以下代码添加到配置文件中去:
set $skip_cache 0;
    #post 访问不缓存
    if ($request_method = POST) {
    set $skip_cache 1;
    }
    #动态查询不缓存
    if ($query_string != "") {
    set $skip_cache 1;
    }
    #后台等特定页面不缓存(其他需求请自行添加即可)
    if ($request_uri ~* "/wp-admin/|/xmlrpc.php|wp-.*.php|/feed/|index.php|sitemap(_index)?.xml") {
    set $skip_cache 1;
    }
    #对登录用户、评论过的用户不展示缓存
    if ($http_cookie ~* "comment_author|wordpress_[a-f0-9]+|wp-postpass|wordpress_no_cache|wordpress_logged_in") {
    set $skip_cache 1;
    }
    #这里请参考你网站之前的配置,特别是sock的路径,弄错了就502了!如果你的网站使用PHP7.4,就写-74.sock
    location ~ \.php$ {
        try_files $uri =404;
        include fastcgi_params;
        fastcgi_pass unix:/tmp/php-cgi-84.sock; #修改成自己的PHP版本
        fastcgi_index index.php;
        fastcgi_param SCRIPT_FILENAME $document_root$fastcgi_script_name;
        # FastCGI 缓存设置
        fastcgi_cache_bypass $skip_cache;
        fastcgi_no_cache $skip_cache;
        fastcgi_cache WORDPRESS;
        fastcgi_cache_valid 200 301 302 30d;
        # 添加缓存头
        add_header X-FastCGI-Cache $upstream_cache_status;
    }
    # 缓存清理
    location ~ /purge(/.*) {
        allow 127.0.0.1; # 仅允许本地访问
        deny all;
        fastcgi_cache_purge WORDPRESS "$scheme$request_method$host$1";
    }
加好之后的截图如下:
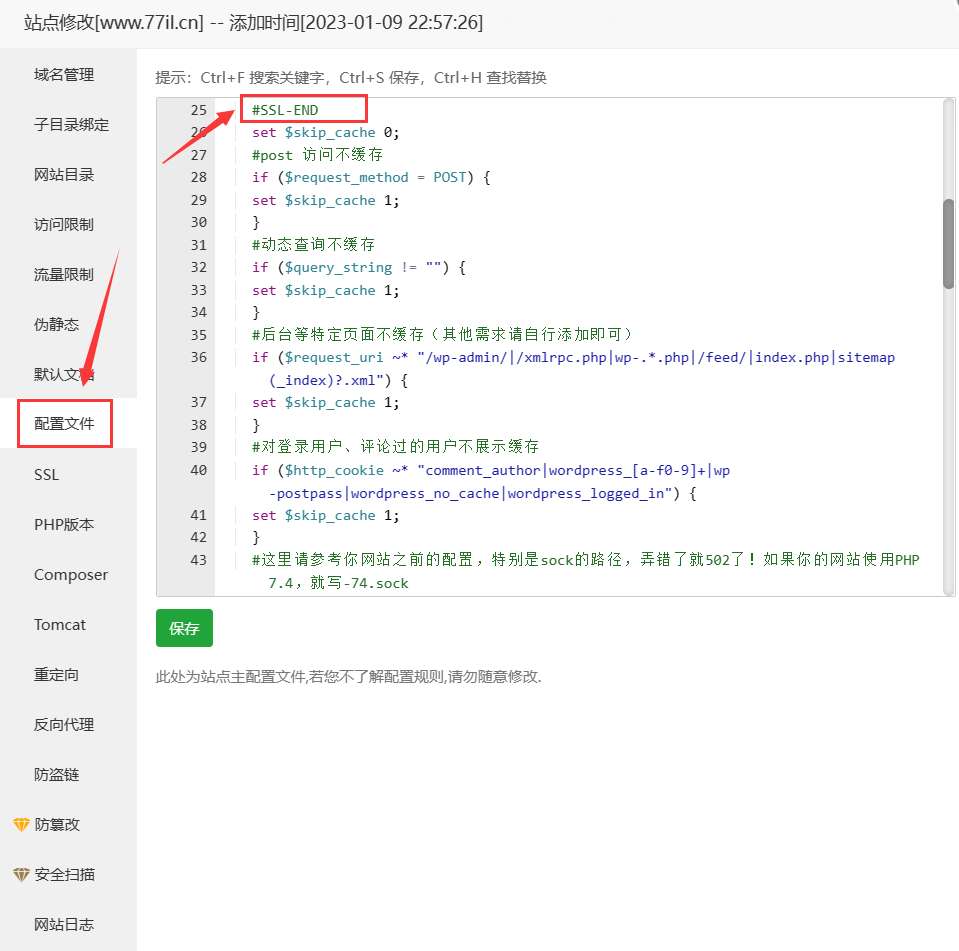
个人推荐放在#SSL-END
添加好之后,重载Nginx设置,缓存就加好了。
WordPress清理缓存插件
后台搜索 Nginx Helper 插件安装启用,这个插件是为 wordpress fastcgi_cache缓存 打造的一个插件,十分的好用。
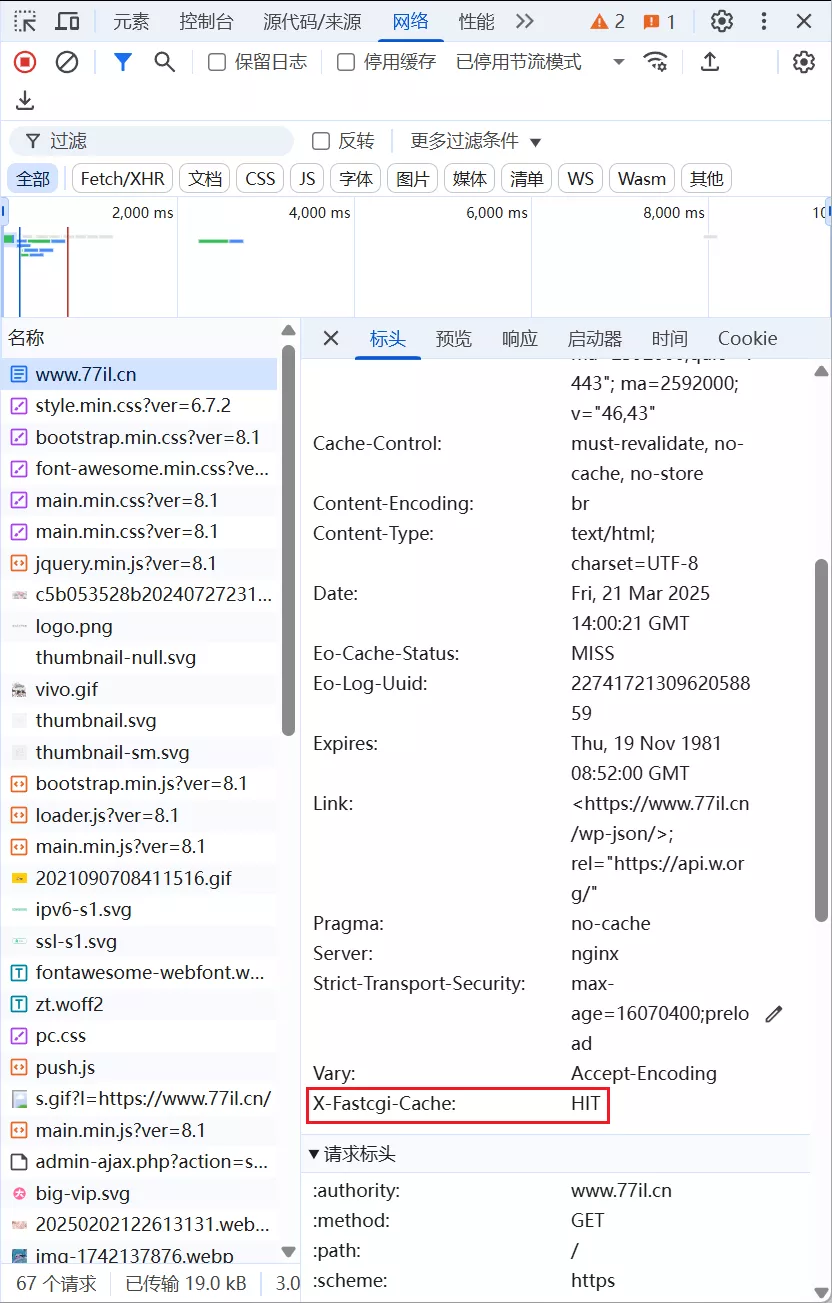
判断缓存状态
按 F12 开启开发者工具,访问你的网站,并检查响应头是否包含 X-FastCGI-Cache:
HIT表示缓存命中。MISS表示未命中。BYPASS表示跳过缓存。
Nginx缓存清理失效
在WordPress配置文件中添加:
//根据实际情况定义缓存的存放路径
define( 'RT_WP_NGINX_HELPER_CACHE_PATH','/var/cache/nginx/fastcgi_cache');
不知道添加到第几行的话,可以添加到 define(‘WPLANG’, ‘zh_CN’); 的后面即可。添加后建议重载一下 php,确保变量生效。
PHP防跨站攻击设置
这个一定要关闭,否则在后台插件将无法清除缓存。
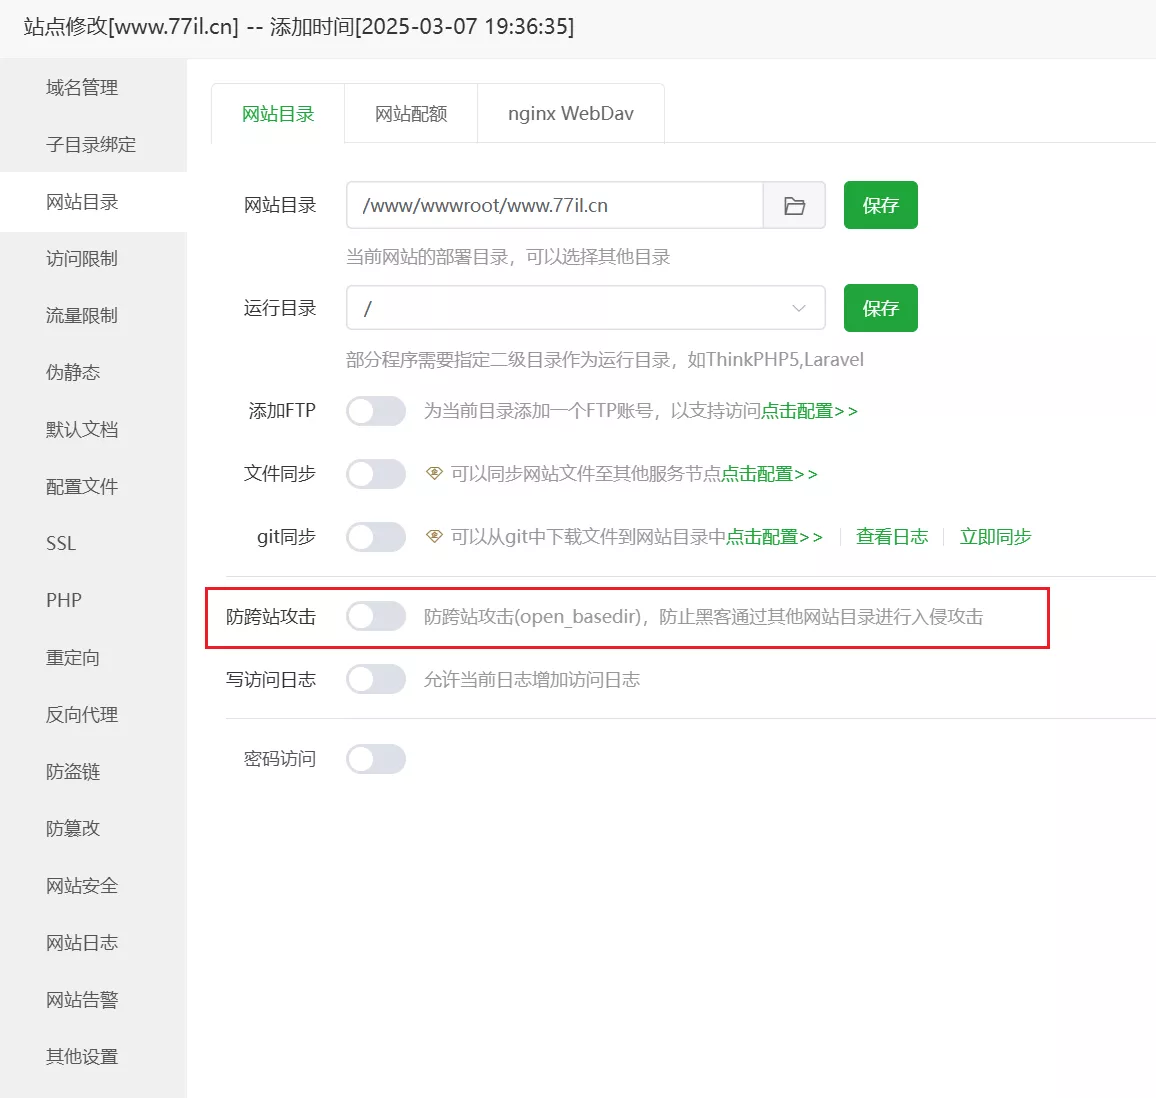
至于黑客攻击,真要搞你,你是防不住的。
如果实在是在意,你可以将缓存目录设置在网站文件夹里,后续步骤的路径都要一一对应。
建议
这个缓存基本上秒杀所有的PHP缓存,还是推荐大家使用的。